A couple of days ago, I discussed keeping your system running efficiently with periodic HDD defragmentation. Under Windows XP and 2000 this is done by clicking on START > Programs >Accessories > System Tools > Disk Defragmenter. From there follow the wizard to defragment your HDD. This can also be setup as an automated task on specified schedule so you can set it and forget it. Part 1 of my tutorial on scheduling an automatic HDD defrag under Windows XP and Windows 2000 is below. Look for part 2, scheduling automated HDD defrags under Windows Vista tomorrow. 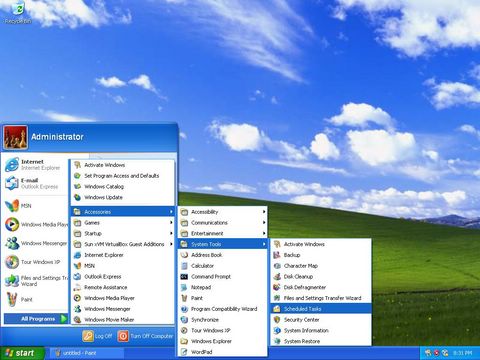
Step 1 of 10: Click on START > All Programs > Accessories > System Tools > Scheduled Tasks 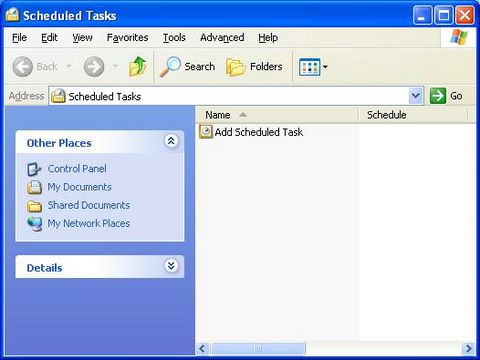
Step 2 of 10: Double Click on "Add Scheduled Task" 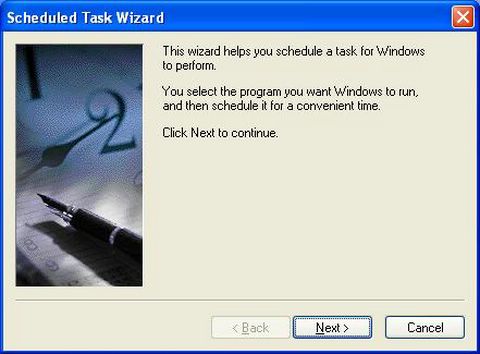
Step 3 of 10: When the scheduled task wizard starts, click "Next" 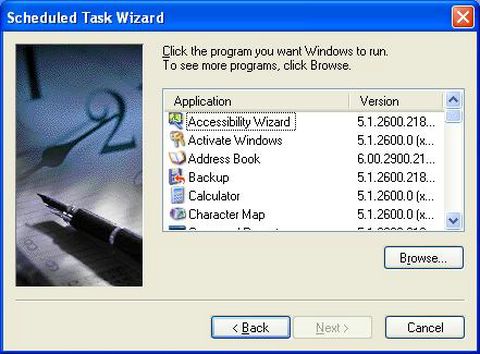
Step 4 of 10: From the Program Selection option, click "Browse" 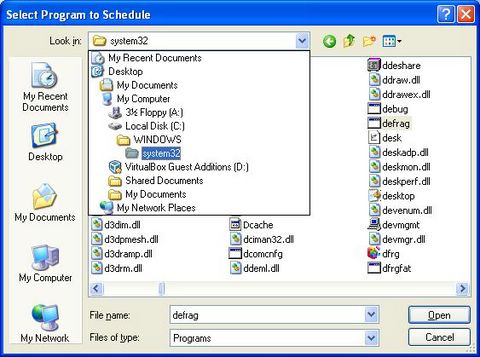
Step 5 of 10: Using "Look in" navigation, navigate to C:\Windows\System32. Locate and open"defrag"
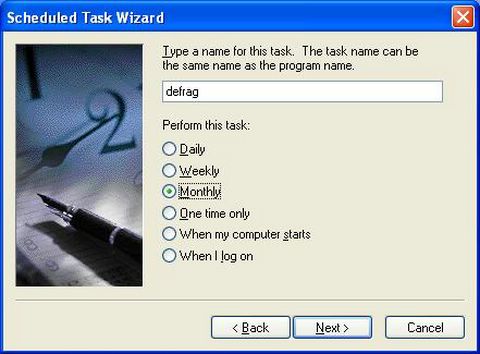
Step 6 of 10: Select how often you want the defrag to run and click next 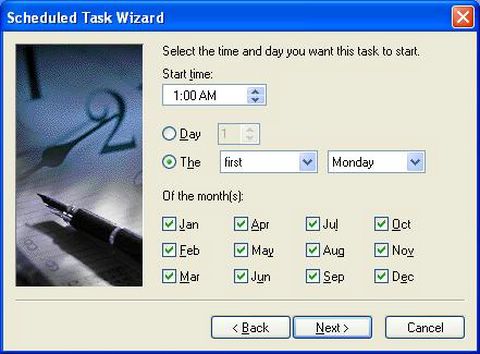
Step 7 of 10: Select start time and other parameters and click next. Helpful hint - make sure you select a time during which your computer is powered on but not in use. 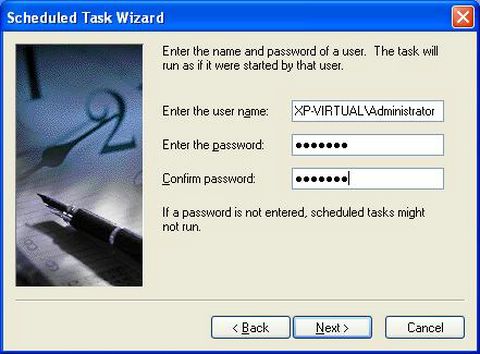
Step 8 of 10: Windows requires that you enter a user and password (twice) so the task can run as if you were sitting at the machine. This will be your username and password. Click Next 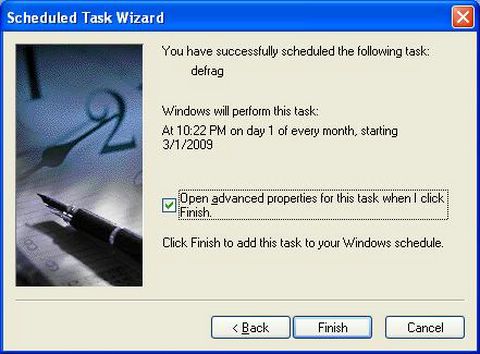
Step 9 of 10: The task scheduler wizard confirms that you have setup your defrag task. Select "Open Advanced Properties" and click Finish

Step 10 of 10: In the "Run" box, it will say "C:\windows\system32\defrag.exe". You must add a SPACE and drive letter notation. So, for example, if you want to defragment drive C, you would modify the "Run" box to say "C:\windows\system32\defrag.exe c:" (without quotes). Click OK to finish. At this point, the scheduled task wizard will prompt you once again for your password.
![[KickIt]](http://www.dotnetkicks.com/favicon.ico)
![[Dzone]](http://www.dzone.com/favicon.ico)
![[Digg]](http://cdn1.diggstatic.com/img/favicon.a015f25c.ico)
![[Reddit]](http://www.reddit.com/favicon.ico)
![[del.icio.us]](http://www.delicious.com/favicon.ico)
![[Facebook]](http://www.facebook.com/favicon.ico)
![[Google]](http://www.google.com/favicon.ico)
![[StumbleUpon]](http://www.stumbleupon.com/favicon.ico)
![[Twitter]](http://stgeorgepcdoctor.com/pics/tweet.jpg)
Tags: maintenance, defrag, hdd, storage, scheduled tasks, optimization, performance, defragmentation, windows